
Termination Protection is a feature in AWS EC2 that helps prevent accidental deletion of your instance. When enabled, it prevents the instance from being terminated through the AWS Management Console, CLI, or API. This is especially useful for critical servers such as production or database instances.
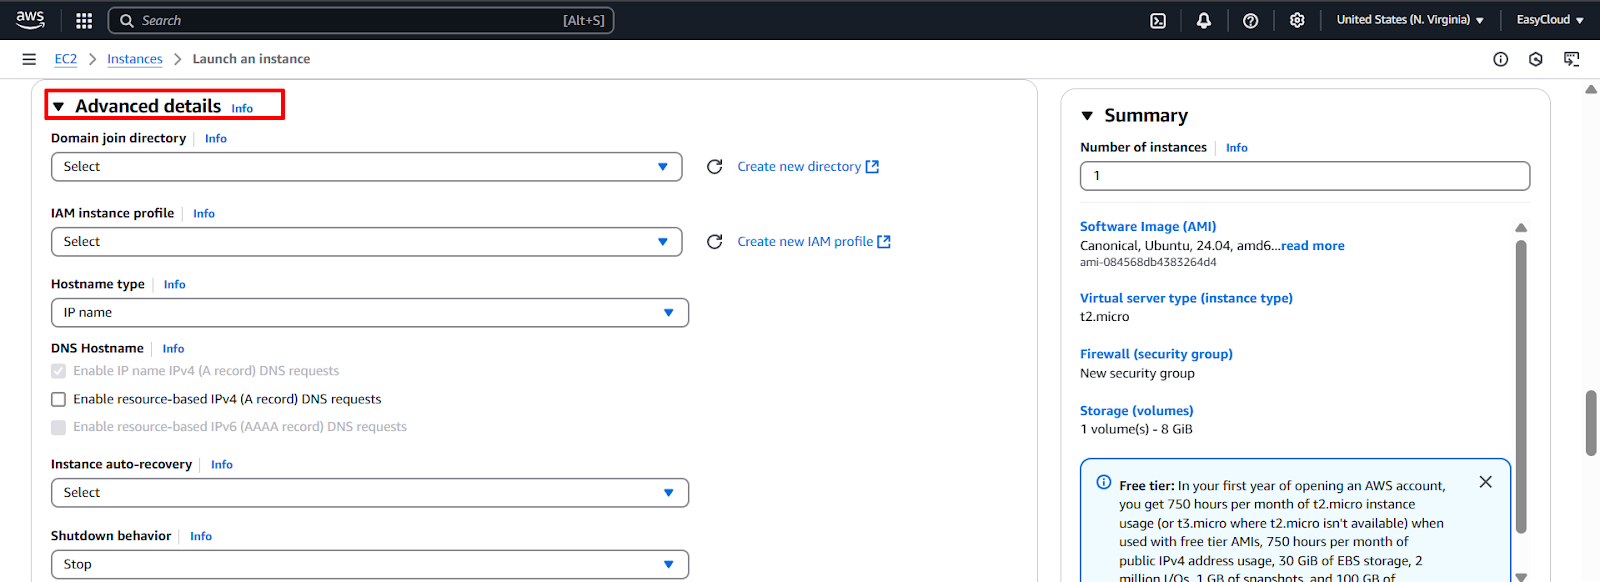
1. When launching the server, you can set termination protection by clicking on Advanced Details. In this section, you will find additional options, including the ability to enable termination protection.
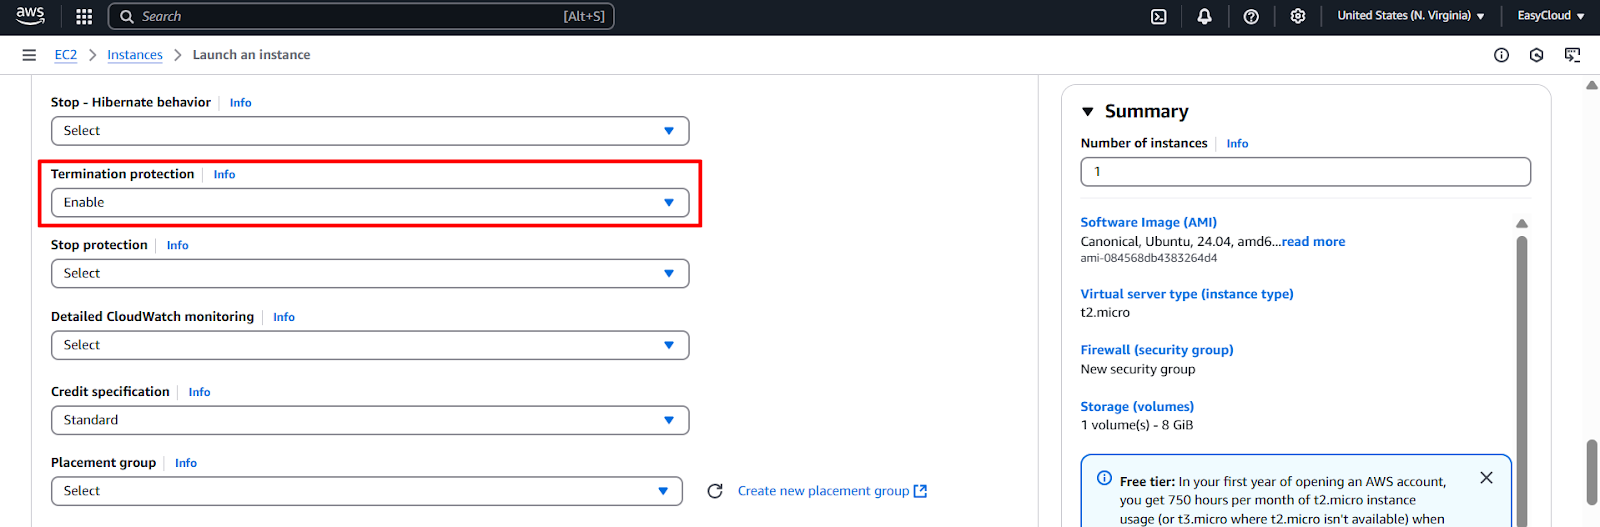
2. Locate the Termination Protection option and enable it
3. Then, launch the server and verify whether it is running successfully.
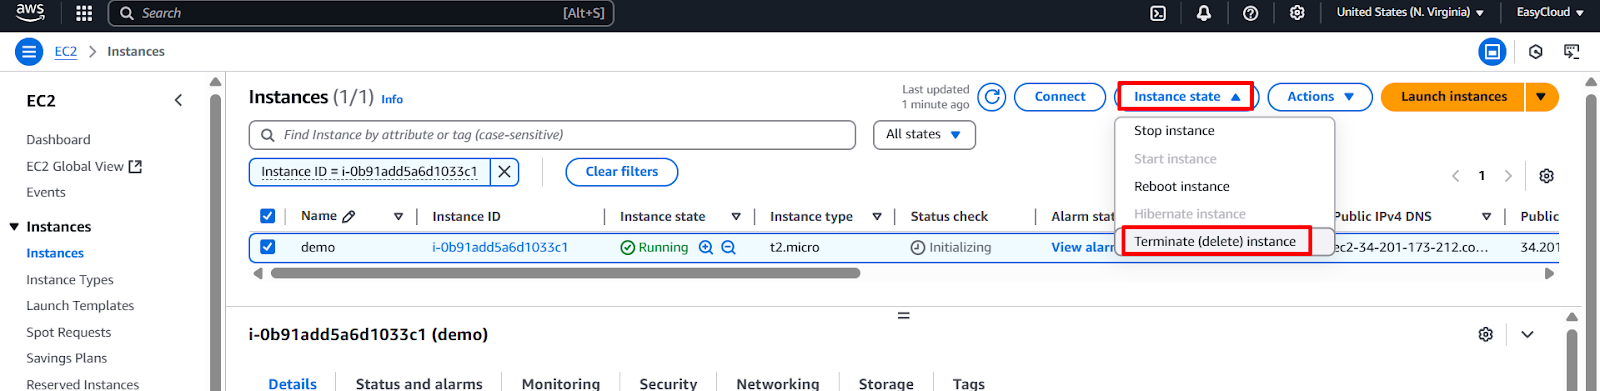
4. Next, try to terminate the server and observe the message displayed in the console.
5. Check the popup message that appears, then click on Terminate to proceed.
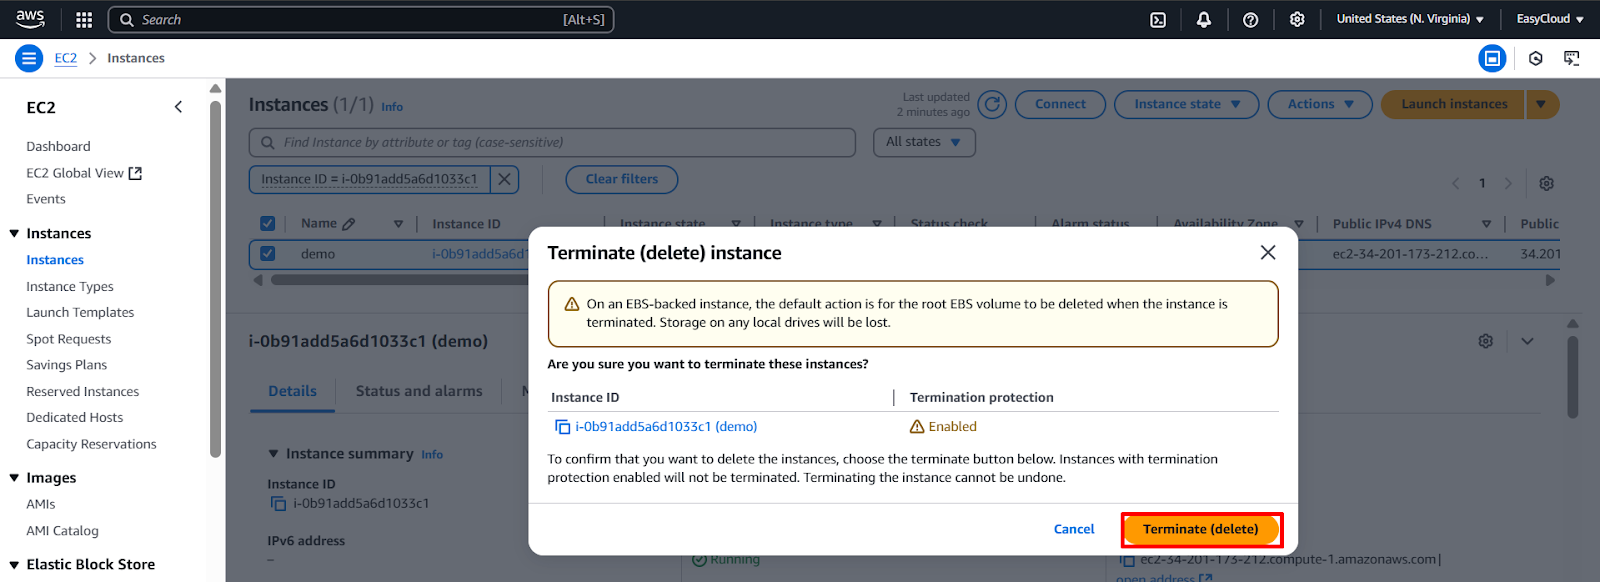
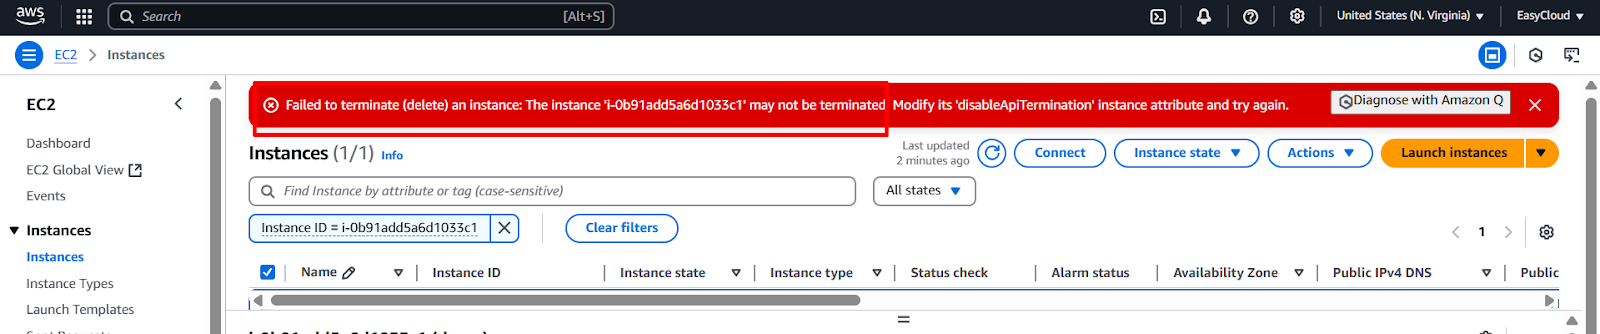
6. The system will display a message like “The instance cannot be terminated”, indicating that termination protection is enabled.
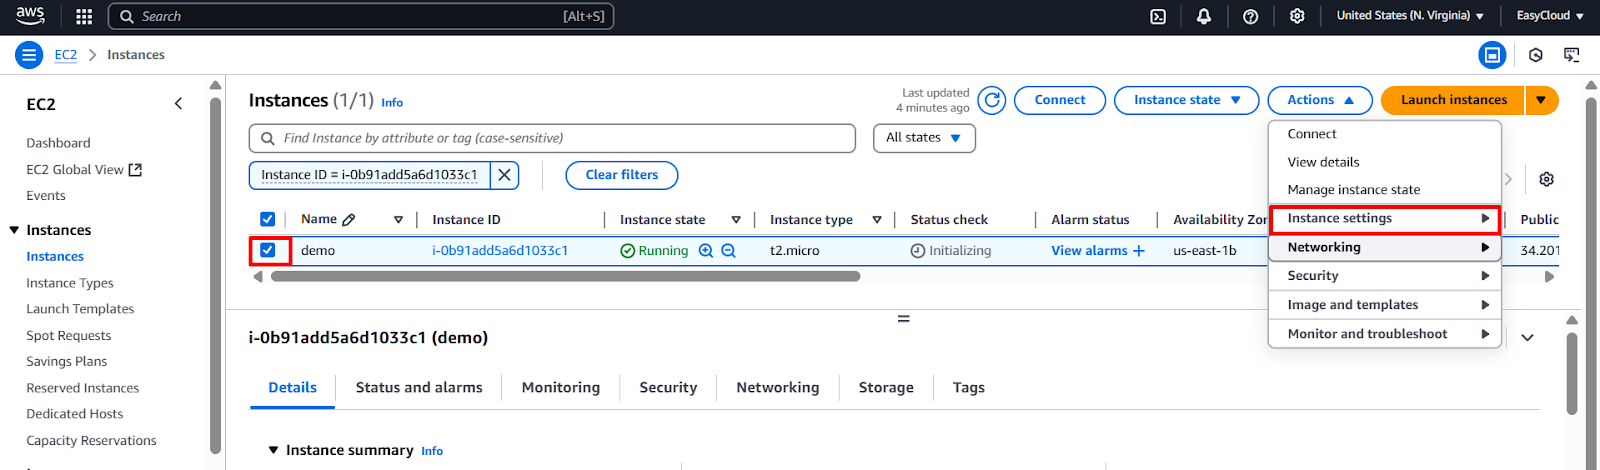
7. hen, you need to disable termination protection. First, select the server, click on Actions, and choose Instance Settings.
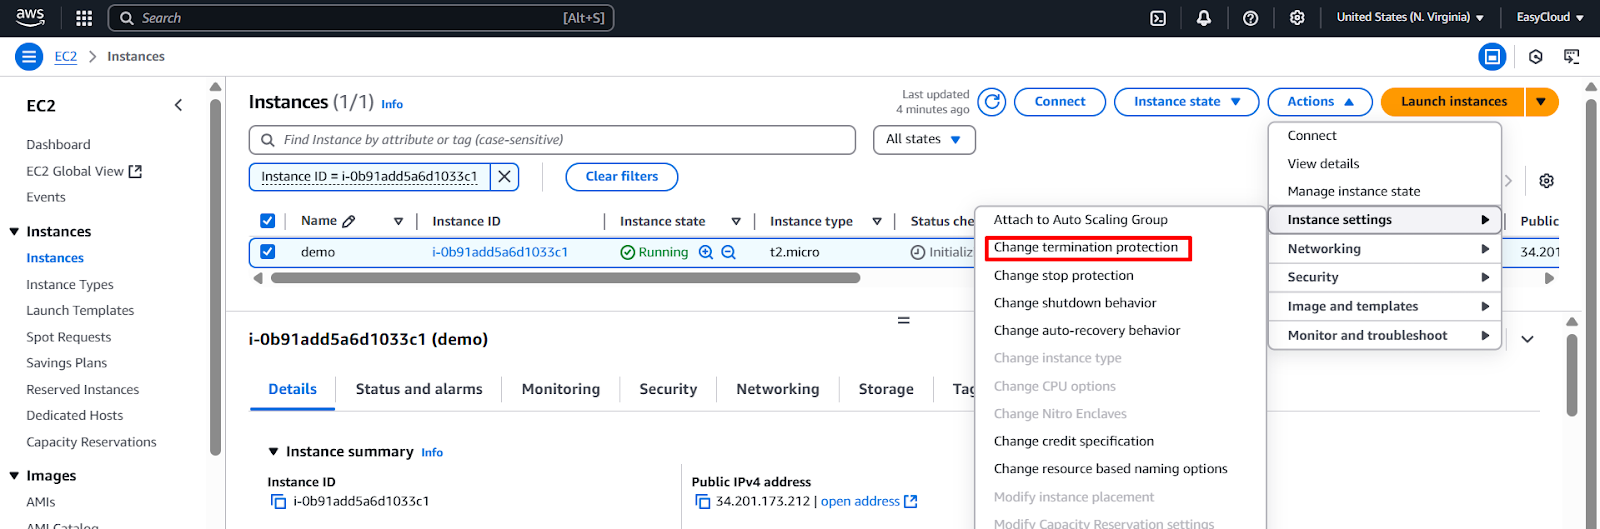
8. Then, select the Change Termination Protection option.
9. A popup will appear where you need to uncheck the Termination Protection option.
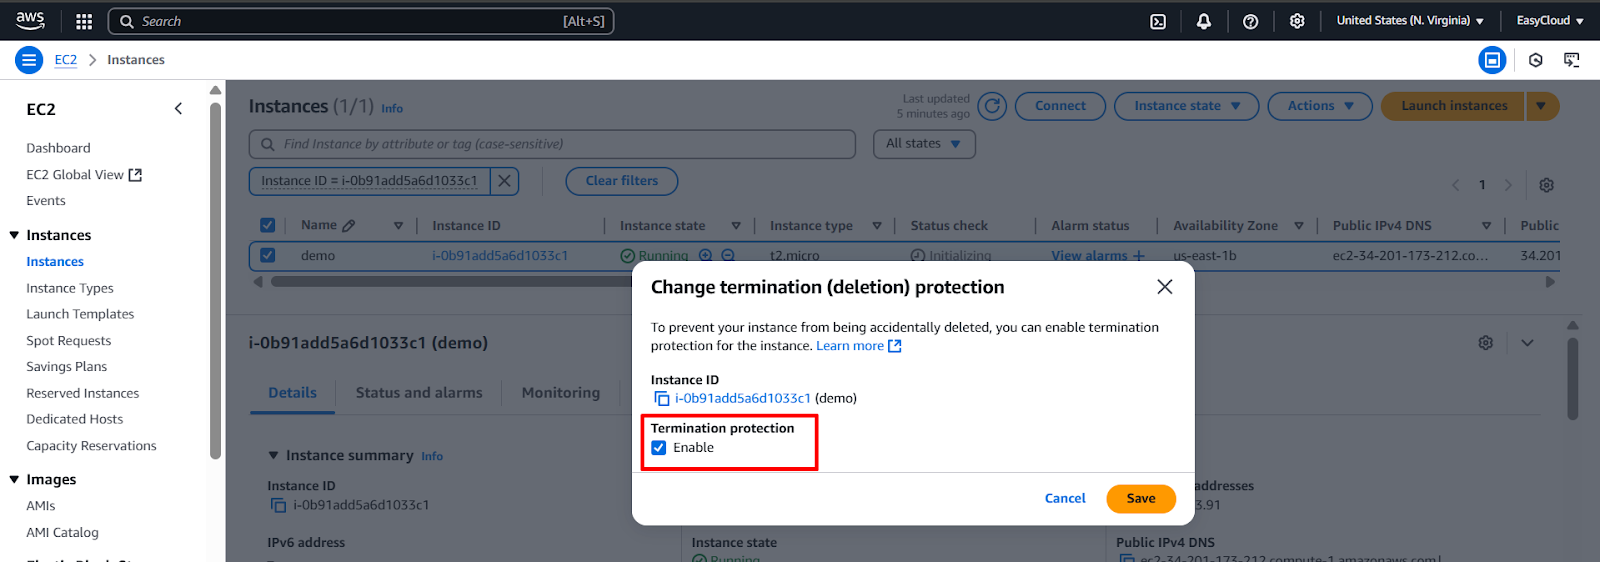
10. Uncheck the Termination Protection option and click Save to apply the changes.
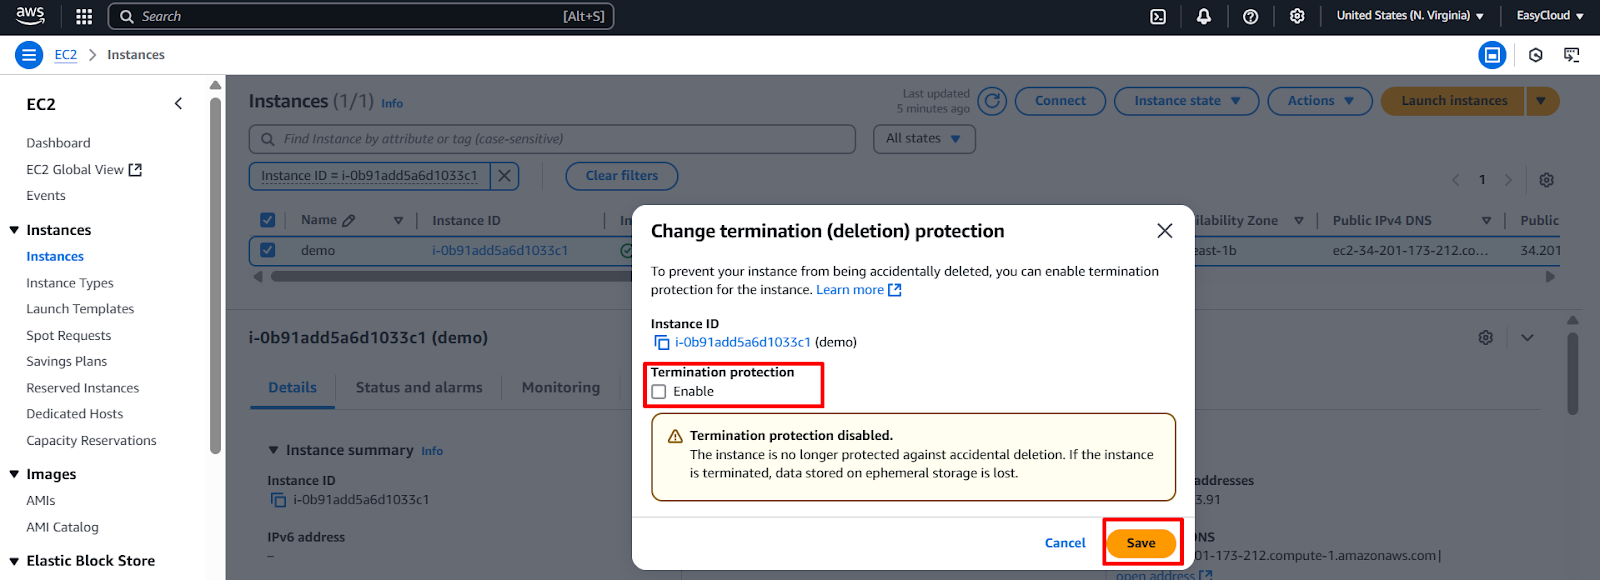
11 . The system will successfully remove the termination protection after you click Save.

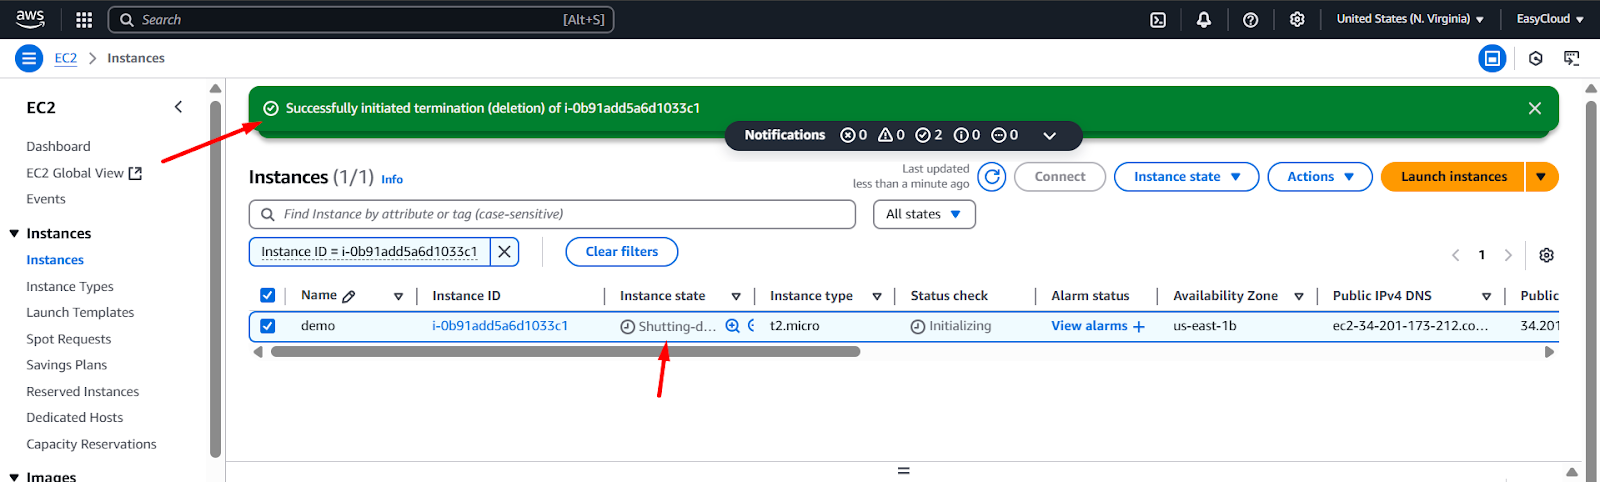
12. Then, try to terminate the server, and you should see that the server is successfully terminated.
END